
One of the main goals of HubHazard is to make the setup step as easy as possible. In this post I’ll present the simplest way of creating a HubHazard project - using the HubHazard Basic Template. In short:
- Create a new repository from the template.
- Clone the repository
- Install dependencies (
npm install) - Start the server (
npm run start:dev)
Creating a GitHub repository from a template
It’s always a good idea to start your project by creating a git repository for it. Go to the HubHazard Basic Template GitHub repository and press the Use this template button to create a repository out of it.

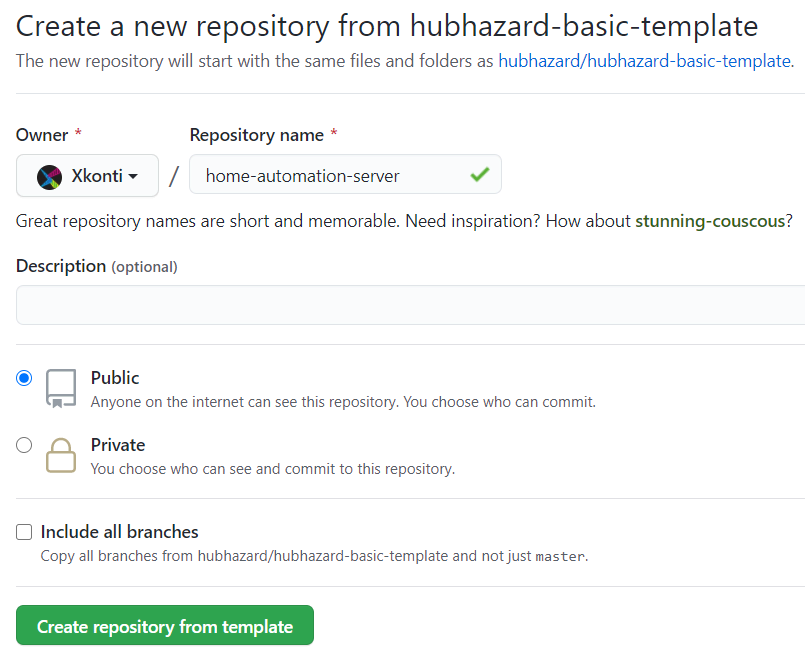
On the next screen give your repository a name and click the Create a repository from template button. Your new repo is ready to be cloned.
After cloning the repo remember to install all packages by running:
npm installProject startup and Nest.js basics
The HubHazard is running on the Nest.js framework:
Nest is a framework for building efficient, scalable Node.js server-side applications. It uses modern JavaScript, is built with TypeScript (preserves compatibility with pure JavaScript) and combines elements of OOP (Object Oriented Programming), FP (Functional Programming), and FRP (Functional Reactive Programming).
The Nest.js framework has an amazing documentation, but you don’t need to know how it really works to use HubHazard. It won’t hurt to know something about modules and providers though.
When working on your automations you can run the server in development mode. To do that just run the start:dev script:
num run start:devThe project should compile and run. The project template comes with one example automation that shows a message every 15 seconds, so you should see those messages:
Under the hood
So what is really going on here under the hood? There are 4 main elements at play:
- Automations - An automation is a piece of code executed when conditions described by its triggers are met. Each automation is represented by a class extending the Automation class. They register to the AutomationsService.
- Events Services - They act as events factories that send those events to subscribed automations. Each events service knows all of its subscribers. Each events service is represented by a class implementing the EventsService class. They register to the AutomationsService.
- Automations Service - A class managing registrations of automations and events services. It links them all together.
In case of the template project we have only one events service and only one automation:

Everything starts with the app.module.ts file. This is the main module of the server. All used events services and automations should be registered here.
import { AutomationsModule, TimerEventsModule } from "@hubhazard/core";import { Module } from "@nestjs/common";import { ConfigModule } from "@nestjs/config";import { BasicAutomation } from "./automations/basic-automation";
@Module({  imports: [    AutomationsModule,    ConfigModule.forRoot({ isGlobal: true }),    TimerEventsModule,  ],  providers: [BasicAutomation],})export class AppModule {}
All events services mentioned in imports will be automatically registered in the AutomationsService. Similarly all automations mentioned in providers will be automatically registered in the AutomationsService. All you need to remember about when creating a new automation is to add it to the providers list in the app.module.ts file.
When the BasicAutomation is registered, it’s passed to the TimerEventsService. The TimerEventsService scans triggers of the automation in search for ones it can handle. In case of BasicAutomation there is one trigger definition asking to run the automation once every 15 seconds. The TimerEventsService remembers it and will send an automation event directly to that automation every 15 seconds.

All automations must implement the handleEvent function. That function is called by events services and used to provide the automation events.
import { Automation, TimerTrigger } from "@hubhazard/core";import { Injectable } from "@nestjs/common";
@Injectable()export class BasicAutomation extends Automation {  readonly name = "Basic automation";  readonly triggers = [TimerTrigger.every(15, "seconds")];
  private counter = 0;
  // Handle the timer event  async handleEvent() {    this.counter++;    console.log(`Triggered the '${this.name}' ${this.counter} times.`);  }}